Within each bus you can group devices together to create “volume zones”. Let’s say you have an FX-panel on the wall and want to be able to adjust the hallway and the toilets separately. You do this by making groups and assign volume controls accordingly. Here’s how it’s done.
The basics first
- Make sure you’ve got the latest version of EAS Admin installed and that you’re patched in to the bus somewhere using a CP-V or USB dongle.
- After connecting to and scanning your system, you should have a list of connected EAS modules in the top-half of the EAS Admin window.

- Your list of modules should contain both an FX volume panel and at least one module capable of acting as volume group masters (like the NODE-4D and AMP-250D in this example).
If you’re missing one or more modules, make sure they have unique IDs. If two modules have the same ID, they will both be missing from the list after scanning your system.
Create a New Group
- Click New Group on the top of your module list.

- Instead of a default name like “Group 1”, feel free to give it a name that provides some context.
- Then select your Master module. It will take responsibility for keeping track of group members and relaying commands. The Master will naturally become the first group member on the right side list, indicated with a crown.
- Add other available devices to this group as fits the project. You don’t have to, as you migt just want to control one single module with a strip on your FX panel.
- Now decide on a group ID. This is used to direct messages coming from the FX panel in the next section.
- Lastly, press the green Store button.
Configure the FX panel
- In the top list of modules, find and click the FX panel you want to configure. This will bring up the panel configuration editor in the bottom half of the window.

- Under Layout on the left, click the strip you want to control to the group you just made.
- Under Editor, simply select the ID/name of that group.
And that’s it. You’re done. The panel should now go from blinking like this:
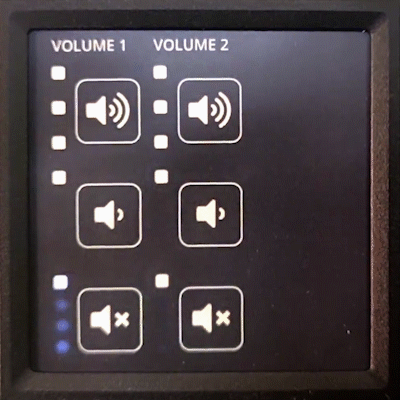
To statically showing the current volume/status like this:
